Showing posts with label Christmas. Show all posts

Tuesday, December 30, 2014

Merry and Bright

We have had very full, very festive days as of late.

Here is some of my photo journal:


Do you feel ready for 2015?  What holiday foods rocked your world this year?  Does a new year excite or daunt you?

Tuesday, December 24, 2013

From my Haus to Yours...


Wishing all a very lovely year-end...thank you for your support and friendship, here in this place!


Wednesday, December 18, 2013

Christmas Card DIY

I had such a wonderful time helping our son Oliver make his Christmas cards this year!  I'm glad I took the time to pay attention to him and listen to his ideas for the one afternoon it took to complete.  This is, after all, how we wanted to raise our kids...to be a part of the process - to teach them what we know - to encourage ideas and watch them unfold together.  In addition to making the card, we created a very special memory too!

(To view cards from previous years, click here and here. )

The finished card!  I used the same template and method I have in previous years to bring Oliver's vision to life.


At the drawing board: Oliver turning his fingerprints into angels!

Hope you are all having wonderful end-of-year-days, no matter where you are or what you celebrate!

Wednesday, December 4, 2013

Acrylic Afternoons

This year's handmade ornaments were born out of one of those middle-of-the-night inspirations.


the Christmas 2013 collection


...acrylic paint on cotton...

...a thin layer of ModPodge, then left to dry...

...and then sewn into their coordinating felt casings!


 I haven't painted on fabric in years...I have a feeling it's the start of something new for me!

Wednesday, December 26, 2012

Family Portrait Painting - Christmas Edition

We are packing up the boxes and paper today (...and discussing the role/necessity/tradition of brussel sprouts at Christmas dinner...).  What a wonderful feast and festival we've had over these past few days!

I was most excited to give my sister-in-law a painting I finished, just in time.


Mr. Hausfrau has had this little picture of him and his sister sitting on Santa's lap circa early 80's forever...it was just recently that I thought it might be fun to paint!


Hope everyone is having a lovely last few days of 2012!

Thursday, December 13, 2012

Winter, Stockholm Style

Turns out the theme of my December is a distinctly Swedish one.  Nothin' wrong with that!


Got It:


Meet our new dining room chair set!   We are in good company, loving this design-y seat...

Feel It:


I miss my sister extra lots when I stream this sister duo.  Beautiful and haunting. 
My no. 1 soundtrack for gift wrapping once the kids have gone to bed.  Listen here.


Make It:


Wanna make your own IKEA meatball dinner?  I tried this recipe this week...totally amazing...don't leave out the steak sauce or the vermouth!

Scandinavian Meatballs in Mushroom Sauce

FOR MEATBALLS

1 1/2 lb ground beef
1/3 cup minced onion
1/4 cup dry breadcrumbs
1 large egg
1 clove garlic, minced
4 shakes Worcestershire sauce
1 1/2 tsp fine salt
1 tsp ground black pepper

FOR MUSHROOM SAUCE

2 Tbsp extra virgin olive oil
1/2 cup diced onion
1 lb button mushrooms, sliced
1 clove garlic, minced
2 Tbsp all-purpose flour
1 1/2 cups low-sodium beef or chicken stock
3 Tbsp bottled steak sauce
3 shakes Worcestershire sauce
2 Tbsp dry vermouth
               coarse salt and ground pepper

For meatballs, combine ground beef with remaining ingredients  Scoop or shape small meatballs, about 1/2 inch (1cm) across and chill until ready to cook.

For mushroom sauce, heat 1 Tbsp of oil in a large saue pan on medium-high heat.  Sear meatballs to brown on all sides, but not cooked completely.  Remove from pan and reserve.  Reduce heat to medium and add remaining oil.  Add onion and saute until translucent, about 5 minutes.  Add mushrooms and saute until tender and any excess liquid has evaporated.  Add garlic and flour and stir to coat mushrooms, cooking for 2 minutes.  Pour in about 1/2 cup of stock, stirring constantly, until it has been absorbed by the flour.  Switch to a whisk and whisk in remaining broth.  Stir in steak sauce, Worcestershire sauce and vermouth and bring up to a simmer.  Add meatballs and cover, letting simmer until meatballs are cooked through, about 10 minutes.  Season with salt and pepper and serve.

Serves 4

From Anna & Michael Olson Cook at Home


Thursday, December 6, 2012

A Very Kindergarten Christmas

The other day Oliver and his friend sat at our dining room table with a big stack of white paper, a huge assortment of felts, and tons of ideas.  As always happens when kids put their creativity to work,  they had some really beautiful pieces to show off.

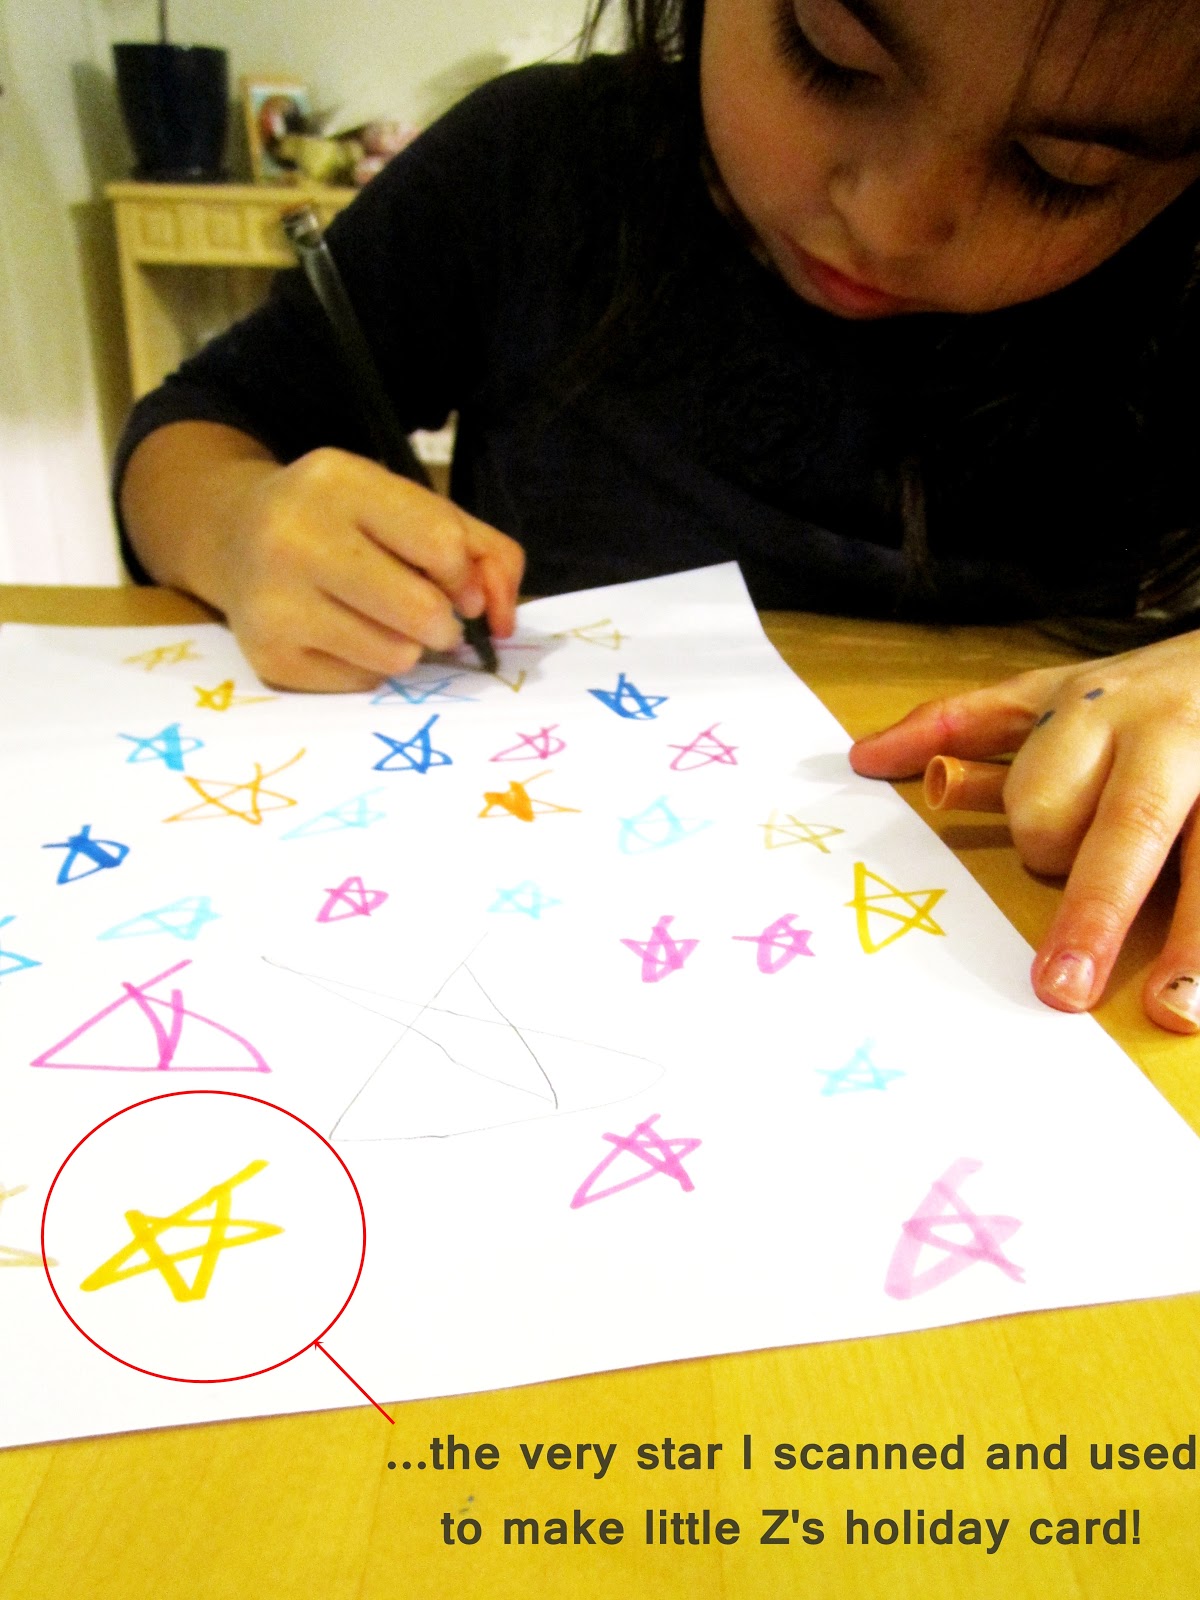
As it happened, they both had winter on their minds.  Their creations then in turn inspired me:  I ended up scanning parts of their doodles to create a very unique and personal set of Christmas cards for them to hand out to their friends at school!


O is working hard at drawing a snowflake...

...which he decided looked more like holiday branches
by the time he was done.
I scanned his branches, adding a Christmas messsage.


It was simple to create a print - and - fold template. 
To help Oliver out, I scanned his printed name in too.
He'll have lots of work printing in his friend's names!

The fold-and-sew cards make perfect pockets to tuck a sweet treat into!


...and his little friend's work:


A pretty stack ready to deliver!


Really, I'm so pleased that I am able to continue the annual tradition of homemade cards for our Oliver.  He is so proud of his makings and is learing about accountability and giving all at the same time! 

Sunday, November 18, 2012

Easy-Peasy Christmas Stars

We are getting a head start on our gift making this year!

I found these wonderful, whitewashed wooden star ornaments at Ikea about a month ago, knowing instantly that they were the perfect canvas for our five year old, Oliver.

I set out my embarrassingly eclectic selection of nail varnish (I knew this medium would hold up better than regular markers to the silver glitter varnish spray I sealed the stars with) and let him have at it!


The end result is really beyond my imagining.  I think they are perfect little works of art....sparkling and swirly, celebratory and fun!  Truly I am sad to have to pass them on.  Oliver has already decided that his favorite teachers and custodian at school are going to be receiving these this Christmas.  I hope they love them and that these stars twinkle in a special place of their homes.


Thursday, November 15, 2012

Eco-Friendly Christmas Wrapping

I recently had a customer request a set of different sized burlap Christmas bags.  After sourcing a beautiful vanilla cream-coloured burlap, I got to work!


Two from the set.  I used four different images suggested by the customer (missing are the silver
snowflake and the red striped candy cane sacks that were part of the set).  A simple kitchen
twine tie complemented the sacks nicely.


Ready for the customer!


Now I'm working on some Parisian-themed Christmas burlap sacks for another customer.  I do love that people are really trying to re-think wasteful holiday wrapping!  These simple reuseable bags are easy enough for anyone with even basic sewing skills to put together, customizing to your own taste and decor.

Make an environmentally friendly choice this Christmas season...make your own!


Saturday, December 24, 2011

And Peace to All...


Wishing everyone peaceful, healthy days ahead...

Tuesday, December 20, 2011

A Very Preschool Christmas

Oliver has been loving his mornings at preschool nearby.  He gets himself dressed with enthusiasm, straps on his little backpack and says goodbye without looking back!

On the last day before Christmas break, Oliver handed out cards he'd coloured himself to all his little friends!


Method:

LAST Christmas when Oliver was three (and I was very pregnant with Charlotte), we did lots of colouring and drawing.  I often pulled long sheets of white paper off a roll, fix tightly to the coffee table and let him have at it.   On one occassion, I drew a few holly + berries with a black sharpie and let him doodle in and around them with felts.  I took this photo with my basic Canon:


I played with it in my photo editor to brighten, sharpen and remove a pen lid that got into the shot.  Also in the editor, I added a Christmas greeting and Oliver's name.  I had the final product printed at a local printshop, then stuck the photos to blank postcards.  As a final flourish, I taped a small fruit-flavoured candy cane to the back and drew a curly ribbon through the top corner of each card.   Oliver distributed them with such pride!  I use this method often to include a Oliver's (sometimes accidental) artwork into my collection of note and greeting cards.

Also this week, we are reading a very sweet German Christmas story book from the mid-80's called "Am Heiligen Abend" . Oliver is very excited about the days to come!


from "Am Heiligen Abend"

Friday, December 16, 2011

Apricot Lebkuchen Brownies

I had a couple of free hours to finally put together some goodies for holiday guests expected next week!


Apricot Lebkuchen Brownies + Fruit, Nut, Chocolate Bites

Apricot Lebkuchen Brownies

I do love a chocolate nut option on a dessert plate.  This one is moist, and tastes of German spice cookies too!

(an adaptation of these)

Ingredients:
  • 1/3 cup apricot jam
  • 3 1/2 ounces unsweetened chocolate, chopped
  • 2/3 cup unsalted butter, cut into pieces
  • 1 cup sugar
  • 1 teaspoon vanilla
  • 2 unit large eggs
  • 1/4 cup ground hazelnuts
  • 1/2 cup all-purpose flour
  • 1/2 tsp baking powder
  • 1/4 cup cocoa powder
  • 2 tsp lebkuchen spice
  • 1/2 teaspoon salt

Directions:

  1. Preheat oven to 350°F and butter and flour an 8-inch square baking pan, knocking out excess flour.
  2. In a small bowl stir jam until smooth and set aside. In a heavy-bottomed saucepan, melt chocolate and butter over low heat, stirring until smooth and remove pan from heat. Scrape mixture into a large bowl and cool 10 minutes. Stir in sugar and vanilla. Add eggs, 1 at a time, beating well with a wooden spoon until mixture is glossy and smooth. In a bowl sift together flour, cocoa, baking powder, spice, ground nuts and salt and add to chocolate mixture, beating just until batter is combined well.
  3. Spread half of batter evenly in pan. Drop jam by spoonfuls onto batter and spread carefully to form an even layer. Drop remaining chocolate batter by spoonfuls onto apricot jam and spread carefully to form an even top layer. Bake on center rack of oven 25 to 30 minutes, or until a tester comes out clean. Cool brownies completely in pan on a rack before using a small, round cookie cutter to cut shapes.
  4. Pour a simple sugar glaze overtop and decorate with diced dried apricots. (I used the find of the century instead: chocolate covered apricots from Tickleberry's !)

The Fruit, Nut and Chocolate Bites don't even need a recipe.  Pinch together a dried apricot with a raw almond, dip one half into melted chocolate and lay on a sheet of waxed paper.  Let cool in the fridge for one hour then store refrigerated in tupperware for up to one week.

I quickly made some gift-wrap cones to hold a few Fruit, Nut and Chocolate Bites for guests who (un)expectedly stop by  (tip:  put the bites into a small ziplock bag before putting into the cones).


This is the extent of my Christmas 'baking' and I'm happy with the yield!  I chose to consider my family's sanity and not over-estimate my capabilities and time-contraints...

Monday, December 12, 2011

The Homemade Advent Calendar

This is my Advent calendar:


My mom made a huge one of these (after her own pattern) when I was small.  Every day my sister, brother and I used to attach another ornament to it until it was completely decorated, just in time for Christmas!  My sister and I made smaller ones for ourselves before we left home.  The little replica reminds me of my childhood at Christmas.

This week I have a short to-do list that likely resembles everyone elses:
  • wrap gifts
  • write + mail cards (the International mailings have gone out long ago, of course!)
  • produce a batch of christmas treats (apricot lovelies and lebkuchen delights this year, I think)
  • get out for walks while it's dry and light out
  • tidy the childens' rooms...this is more or less the neverending daily task though...

The anticipation and tidying really is the most lovely part of Christmas...

Monday, December 5, 2011

Festive Gnomes

Show and Tell!

I made these on the weekend:


They're a version of these...aren't they gnome-tastic?   They will be gifted to my sister, at her annual tree-trimming fest this year.

I'm working on another Wee Wonderfuls giftie, but more on that soon.

Back to ignoring the dust bunnies...

Friday, December 2, 2011

Christmas in Germany

Whenever I am lucky enough to come across one of these, I snap it up faster than you can say "pfeffernüsse".  So far, I only have two, both found at the local German Canadian Seniors Home book sale.

Children's Lexicon
1970 and 1959 editions

The books feature busy pictures of everyday life, including traditional European holidays.  These are the ones depicting Christmas:

Christmas 1959...

...and in 1970.

There are several notes to make here.  These are historical depictions...I'd be curious to see the picture of the 2011 German Christmas...much different again, I'm sure (I hope!).

But let's take a side-by side look at my favorite idiosyncrasy in these two pictures: 


In the span of 11 years, fathers have gone from tender and
helpful in 1959 (attending to the setup of the nativity) to a
removed smoker in 1970!  Suit-wearing at home apparently
did NOT go out of vogue.


I think Mr. Hausfrau falls somewhere in between these two guys...not so much smoking and removed...but I DID recently get a string of pearls from him!

Thursday, November 24, 2011

Christmas Card 2011


This project actually took less time than I thought it would!

Balthasar, Melchior and Caspar might be my favorite characters in the Nativity.  Jesus is born, in humble surroundings to regular mortals.  Then these KINGS stop by with some baby shower gifts...no wait...they bring gold, francincense and myrrh!  Marvelous...

Here is how I went about creating the image for our Magi card:

1)  Printed off a colouring page online:


2)  Using my trusty Crayola felts, I coloured.  Then I took a photo on digital macro setting with my little Canon SD1100.


3)  Using PhotoScape , I fiddled with the image, first adjusting the exposure, then the contrast.  I then applied two filters:  one to make it appear to be painted in water-colours and the other to create an antique photo effect.   I think this made up for my camera's basic capabilities nicely and am pleased with the card we'll be mailing near and far this Christmas!

4)  Now I'm going to send this edited photo to my photofinishing shop and print off however many I need at 30 cents/piece.  Then I'll stick them to some plain cardstock cards.  Voila!


Wednesday, December 1, 2010

Advent Preparations

Advent: waiting, preparing, dreaming...at least in our world.

Oliver and I spend a small part of every day asking out loud "what project should we do today?".  To clarify, we are almost always mulling over art projects (hmph...dusting is NOT a worthy project...at least not in our our world).  It is somewhat a surprise to me that our three year old son and I share a common love of creating lovely things out of scraps and bits.  Posting photos of our "bits and scraps" ornaments will have to wait for a repaired camera but in the meantime, here are some cute, self-explanatory project ideas I'm making note of for the weeks ahead:


Totally do-able for a three year old. 

I think. 

I hope. 

Hm...we'll see!

Wednesday, November 10, 2010

Fading Fall

As my little guy and I toddle around the 'hood, I'm struck by how quickly Fall is becoming Winter.  Our tires have been changed and my recipes are becoming less "fresh tomatoes" more "root vegetable".  No complaints...just sayin'.

Here are the tunes ushering us into the new season:


Excuse the melange....aren't most of us into "a bit of this" and "a bit of that", tho?

Little O and I picked up some adorable gnome wrapping paper and ornaments at Ikea today & ordered a Christmas gift cheese plate on the Kodak site featuring the following fall photo taken by my husband:


Sometimes the "inbetween" times are the most lovely after all.  At least for me!

Related Posts Plugin for WordPress, Blogger...